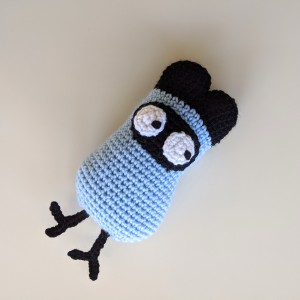
Maskutchi – Tamagotchi Pattern

Hey, everyone! Hope you are all doing well.

My family and I have been in self-quarantine since March 13th. We have only been out a handful of times and have only recently started getting take-out. This has been the most I have ever cooked at home IN MY LIFE and I’m glad to get the occasional relief.

Needless to say, my Etsy shop has been closed since we were told to stay home because there was no way I was going to go to the post office. However, we (my husband and I) have just experimented with USPS home pickup and I have decided to reopen the shop! Yay!

In addition to reopening the shop, I wanted to release a few patterns on here as well. I know I mentioned wanting to do this before and I see that the last ones I shared were my Mini Meat Boy & Bandage Girl patterns – all the way back in July of last year! Wow! I’d say that I’m surprised I haven’t posted here in such a long time but, really, it’s not that shocking – I can never keep up with this blog! In addition to everything else that has been going on, I once again kicked crochet to the curb and rarely picked up a hook. I only started again a week or two ago but it has still been fairly limited.

A few days ago, I was asked if I would be willing to share some of my Tamagotchi patterns. As they were ones I was planning on sharing at some point anyway, I said I would look into it. I knew that I would need to rewrite some of them because many of my patterns are just numbers and tallies.

I wasn’t wrong! With my Maskutchi pattern that I am sharing today, I actually had to rewrite (and test) an entire section of the body! With my original Maskutchi, I did the entire thing freehand and with the “right side” facing out. (Which is the bad side. Crochet is weird. Whatever.) When I rewrote the pattern the first time, I started making it again with the “wrong side” out since it looks cleaner, but realized that Maskutchi’s tush was now going the other way! I adjusted the pattern to get the correct stitch counts but never adjusted it to get the tush pointed in the right direction (lazy me). As I was reworking it this time around (so I could take photos, etc), I knew I was going to have to flip the tush and rewrite the bottom portion entirely.

I’ve included a few pictures in the pattern below which, hopefully, help guide you through the pattern. If you have any questions about it, please let me know and I will try to add some other pictures to help explain it. Also, let me know if you see any typos in the pattern. πŸ˜‰

I hope you enjoy this pattern and please tag me in any photos or posts you make! Want to make a different Tamagotchi? You can also find my Tarakotchi pattern here.

Have a good week!

Rachel

Final Note: As always, this pattern is for personal use only and should not be sold as your own. Please give credit where credit is due! πŸ™‚ Thank you!

———

Let’s get started!

Maskutchi

IMG_20200525_134355~2

Some notes:

  • Crochet Level: Easy/Intermediate
  • Made in the round
  • Terms
    • sc – single crochet
    • inc/dec – increase/decrease
    • FO – Finish off
    • Ch – chain

You will need:

  • Yarn in Red Heart β€œLight Blue”, black, and white.
  • Hooks in sizes 5.00mm (H) and 4.00mm (G)
  • Yarn needle
  • Fiberfill/stuffing
  • Stitch marker or piece of contrasting yarn

“Ears” (Make 2)

With black yarn, begin with MR.

Row 1: sc 6 – 6

Row 2: inc around – 12

Row 3: (inc, sc 1) around – 18

Row 4: (inc, sc 5) around – 21

Rows 5-6: sc around – 21

FO first ear and set aside. Repeat Rows 1-6 for second ear but do not FO.

Row 7: Connect both ears with 5 sc, place a stitch marker to mark the beginning of the round, and crochet around – 32

Rows 8-9: sc around – 32

IMG_20200522_185932~2 Β IMG_20200522_185951~2

To show contrast: the first ear is grey, the second ear is white, and rows 7-9 are orange.

  • Pictures 1-2 show the connecting 5 sc and placing the stitch marker
  • Pictures 3-4 show the first row
  • Pictures 5-6 show rows 8-9

Switch to blue yarn to begin the body.

Row 10-17: sc around – 32

IMG_20200523_082944~2

Row 18: sc 25, inc, sc 6 – 33

Row 19: sc 26, inc, sc 6 – 34

Row 20: sc 27, inc, sc 6 – 35

Row 21: sc 28, inc, sc 6 – 36

Row 22: sc 29, inc, sc 6 – 37

Row 23: sc 30, inc, sc 6 – 38

Row 24: sc 31, inc, sc 6 – 39

Row 25: sc 32, inc, sc 6 – 40

Start stuffing if you haven’t already.

Rows 26-28: sc around – 40

Row 29: sc 10, dec, sc 19, dec, sc 7 – 38

Row 30:Β  sc 10, dec, sc 17, dec, sc 7 – 36

Row 31: sc 9, dec 2x, sc 14, dec 2x, sc 5 – 32

Row 32: sc 8, dec 2x, sc 12, dec 2x, sc 4 – 28

Row 33: sc 7, dec 2x, sc 10, dec 2x, sc 3 – 24

Row 34: sc 6, dec 2x, sc 8, dec 2x, sc 2 – 20

FO and sew shut.

IMG_20200523_160033~2

Eye Area/Mask

With black yarn and 4mm hook chain 10.

Row 1: sc 8 stitches, 3 sc in last stitch. Continue crocheting along the back side of the starting chain for 7 stitches and 2 sc in last stitch – 20

Row 2: Inc in first stitch, sc 7, inc, sc, inc, sc 7, inc, sc 1 – 24

Row 3: sc, in, sc 8, inc, sc 2, inc, sc 8, inc, sc 1 – 28

FO

IMG_20200524_123142~2

Eyes

In white with 4mm hook, make MR.

Row 1: sc 6 – 6

Row 2: Inc around – 12

FO, embroider pupils, and attach to black section.

Attach finished mask to the body.

IMG_20200524_125402_1~2

Feet (Make 2)

In black with 5mm hook:

Attach yarn to bottom of body with a slip stitch (Maskutchi lying face up).

IMG_20200524_132851~2

Ch 10.

Slip stitch back 4 sts, ch 4, sl st back 4, then sl st back up leg.

Slip stitch once more at the beginning of the chain and fasten off.

IMG_20200524_132950~2

And you’re finished!

IMG_20200524_133820~2

Tag me on Instagram @pleasantplushies I’d love to see how yours turned out!

Visit me on Ravelry!

Mini Meat Boy and Bandage Girl

Oh, hey! Long time no see!

If you’ve been following me on Instagram (@pleasantplushies) you know that I’ve been taking a bit of a hiatus from both crocheting and Etsy. Somewhere along the line I just became so incredibly burnt out on crocheting the same things over and over again and new ideas were just NOT happening.

I’d blame my kids (which isn’t too much of a stretch since they occupy ALL of my time) but I’d say that I am just uninspired. I’ve tried working on new crafts/hobbies but it doesn’t seem to be helping much.

I have, however, been reading a lot more and have read a couple of great novels/memoirs! I set a Goodreads challenge this year (24) and I’m only one book away! I felt this would be a good amount for me (2 books per month) but it seems I underestimated myself. Not gonna complain about that! Maybe I’ll set aside a separate blog post for my recent reads… would you be interested in that?

Back to crochet.

Before I set my Etsy shop on vacation mode and told the IG world that I was taking a break, I mentioned that I was planning on releasing some crochet patterns on both Etsy and here on the blog. I’m still trying to figure out which patterns I’d like to share as I’d like a FEW of them to remain my own personal patterns, but I may just release them all and be done with it! I’m still deciding. πŸ˜‰ However, if there are any patterns that you would absolutely LOVE to have access to, please let me know in the comments!

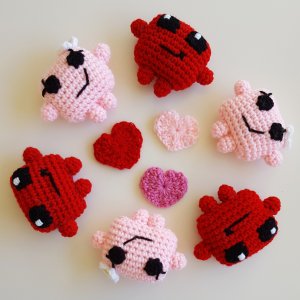
One of the patterns (well, technically two) I knew I wanted to share with you all is my Mini Meat Boy and Bandage Girl set!

These “fun size” plushies are the perfect addition to a gamer’s gift, a stocking stuffer, ornament, keychain… you name it! They’re incredibly quick to whip up and don’t use a ton of yarn or stuffing.

If you make a set, please tag me on Instagram or link back to my blog! I’d love to see how it works out for you! πŸ™‚

Enjoy!

(Note: Pattern contains affiliate links.)
Mini Meat Boy & Bandage Girl

img_20180214_112806_6666266199816436136499.jpg

Basic crochet knowledge is required.

Gauge is not important.

Stitches/terms used:

  • Single Crochet (sc)
  • Half-double Crochet (hdc)
  • Double Crochet (dc)
  • Slip Stitch (sl st)
  • Single Crochet Increase (Inc) and Decrease (dec)
  • Chain (ch)
  • Magic Ring (MR)
  • Finish Off (FO)

You will need:

  • Yarn in Red, Pink, White, Black, and Yellow
  • Hook sizes 5mm (H) and 3.5mm (E)
    • Unless stated otherwise, use H hook.
  • Yarn Needle
  • Stitch Marker (or piece of contrasting yarn)
  • Polyester Fiberfill or other stuffing

Let’s Begin!

Body

With Cherry Red, chain 11.

Row 1: sc 9, 3 sc in next st, sc 8, inc – 22

Row 2: Inc, sc 8, inc, sc 1, inc, sc 8, inc, sc 1 – 26

Rows 3-10: sc around

Row 11: sc 1, dec, sc 8, dec, sc 1, dec, sc 8, dec – 22

FO, stuff, and sew shut.

In Baby Pink repeat rows 1-11.

Arms/Legs (4)

With Red, make MR.

Row 1: sc 6

Rows 2-3: sc around

FO, stuff lightly, and attach.

Repeat with Baby Pink.

Note: I tend to place Bandage Girl’s legs closer together than Meat Boy’s.

img_20180131_141243_5727304399444201701167.jpg

Eyes (2)

For Meat Boy:

In Black with 3.5mm hook, chain 5.

Row 1: sc 4 – 4

Row 2: hdc, dc in next two stitches, hdc – 4

FO leaving a long tail for sewing and embroidering the mouth (between rows 7 & 8). Embroider the eye with white. Attach to body (covering rows 2-4).

Bandage Girl:

With Black, make MR.

Row 1: sc 6

FO leaving long tail for eyelashes (corner of eyes at a 90Β° angle) and mouth (between rows 8 & 9) and attach to body.

IMG_20190730_150341

Flower

In yellow with 3.5mm hook, make MR.

Row 1: sc 6

Switch to white.

Row 2: (sl st, hdc x3, sl st) in each st

FO leaving long tail, and attach.

Please let me know if you find any errors in the pattern or have any problems.

You are more than welcome to sell any finished plushies, but please give me credit in your listings, etc. Thank you so much! πŸ™‚

Rachel

img_20180201_113119_9796159845207273207338.jpg

Pac-Man CAL

Happy New Year!

Another year has come and gone and I’m still terrible at blogging.

One of these days I will get my act together and blog at LEAST once a month. Will it be this year? Maybe. I mean, how hard can it be to post ONCE A MONTH? Apparently, it’s really hard. Ha!

I’ve been absent from WordPress for a while and not just from my own blog. I used to look at my feed everyday to see what others are up to and I haven’t in quite a while. However, in my defense, a lot of bloggers I started off following are not posting as often as they used to either. So it’s not just me!

So… what has everyone been up to?!

I’ve made a few new plushies and other things since I’ve last posted, but the biggest one of all was this Pac-Man afghan I worked on for most of the summer and fall. The pattern is by Chaos and Chop Suey and I won the pattern (and an awesome crochet hook!) in a contest held by Chloe Rebecca Boutique on Instagram!

This corner to corner blanket was part of a CAL (crochet-along) held back in July. A new piece of the blanket was provided each week. There were four panels total (1 banner and 3 game board) , some Pac-Man appliques (which were meant to be adjustable/moveable), and then a border to connect all the pieces (after some sewing).

While the end result is incredibly satisfying, I’d be lying if I said that I enjoyed the entire process. As mentioned, the CAL started back in July but I didn’t finish the blanket until November! I finished the first panel (the banner) mid-July, but as each panel was started it took me longer and longer to complete each one. The constant color changes began to get a bit tedious and, honestly, I was just not having a good time.

The second panel was completed in mid-August, the third was finished the beginning of September, and I don’t know when the fourth one was finished – maybe October? All I know for sure is that it was 100% done by November 16th.

My favorite parts of the blanket? The banner and the border. I mean, just LOOK at that border! The little white dots are everything.

The ghosts and Pac-Man are supposed to be sewn onto buttons so you can easily move the appliques around the game board, but I decided against it and just sewed them straight onto the blanket.

All in all, I really do like this afghan (it’s up in our game room now!) and I’m glad I participated in the CAL. I don’t think I’ll be making anything of this magnitude again anytime soon, however. It took a lot out of me. Phew!

Kirby & Bronto Burt

Leading up to my oldest son’s birthday in June, I began to make a few smaller amigurumis. If you’ve followed me for a while, you may have noticed that I tend to make rather large plushies and I wanted to switch things up a bit.

I’ve started to use a 4mm hook instead of my usual 5mm hook to see the differences between the sizing and stitch gaps. I’ve also had plans to make smaller versions of my plushies just so it won’t take as long to create! But I haven’t done that yet.

Anywho, my husband and son had just recently finished Mario 64 (the camera angles in that game make it hard as balls – no joke) and were trying to find a new game to play together. My husband decided to test out Kirby 64: The Crystal Shards. Unfortunately, the gameplay was a little too complicated for my (now) 4-year old and he was too frustrated to play.

BUT.

While they were playing, I decided to whip up a little Kirby for him to play with. I made this one with a 4mm hook and did it freehand (I have a pattern for a larger one, but I thought a small one would be cute). After I made him, I decided to make a Bronto Burt!

Aren’t they so cute?

The little Kirby is all cute and squishy. Bronto Burt was also made with a G hook but turned out a bit larger! Apparently, one of my G hooks was a 4mm, which I assumed ALL G hooks were, but the other one was 4.25mm! Whaaat? (I feel like I knew this at one point but forgot.) I was a little bummed to find this out, but they both turned out so adorable so I can’t be mad!

Here’s what happens when kids are around and you’re trying to take pictures:

Baby spoons!

As I mentioned before, I was in a mini plush phase, so I also whipped up a little Bob-omb as well! For the most part, the mini Bob-omb was also made freehand but I did use some of my usual Bob-omb pattern. I think the main changes were his feet and eyes.

What a cute, little trio! πŸ™‚

I think that Bronto Burt is a little bit underrated. He’s so dang cute AND he’s one of the first enemies you’ll see in Kirby games! He needs some love, too! ❀

Katie – Animal Crossing

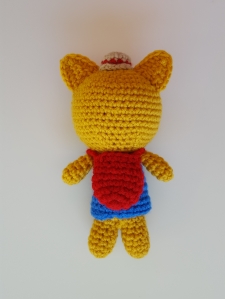
Here it is! Another one of my summer projects: Katie!

If you don’t recognize this cute little kitty, this is Katie from Animal Crossing. I believe she’s been in all of the AC games (except maybe Happy Home Designer). In one game, you’ll find her near the train station looking for her mother. In another, you’ll meet up with her after returning from another town and she’ll wander around town with you!

Back in May, which is when I crocheted her, she had a garden event in Animal Crossing: Pocket Camp. If she’s had any more since then I am unaware as I haven’t played recently (I should get back to it). She’s such a cute little kitty and I just had to make her!

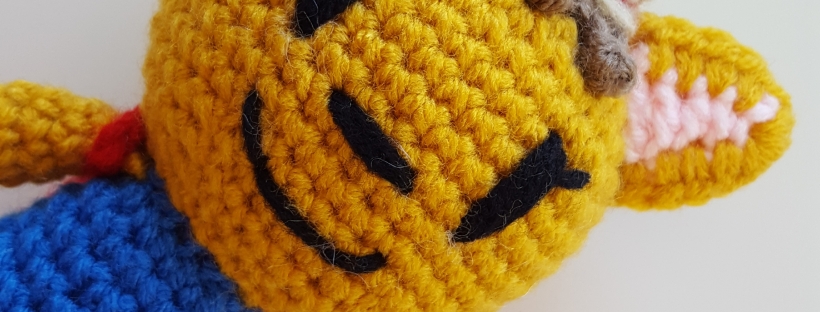
I just love the little details such as her hair and her little hat! I also did her ears a bit differently than I do my usual ones. I think they turned out purrfect! Heh.

I also gave her a little backpack to carry her things around in. Well, it’s really more of a tote bag since I couldn’t figure out how to make a working backpack. But it slips right over her little arms!

Well? What do you think? I may be biased, but I think she’s adorable. Unfortunately, a lot of people I showed her to couldn’t remember who she was.

But you remember, don’t you? I’m not the only one who likes her… am I?

Until next time!

Katie is available in my shop as made to order. At the time of this posting, I have one ready to ship! πŸ™‚

Baby Groot by Twinkie Chan

Hello, friends!

September is here and school is back in session. My oldest is back in preschool and seems to be enjoying it more this time around. There have been no tears and he’s always happy when I return to pick him up. I think part of it is that he knows most of the kids in his class and sees his teachers from before. I’m hoping he keeps it up for a while before the “I don’t want to go to school” thing starts up. *fingers crossed*

Now I just need to figure out what to do with my youngest. They cancelled the Parent Participation class at the school so that’s out… I guess we need to go make some friends!

Anyway, my summer went well. How was yours?

On the crochet front, I worked on several different projects and even fulfilled two commissions which I don’t normally do. One of the projects was from my cousin’s wife (do I call her my cousin? I don’t know…). One of their friends was getting married and she asked if I could make an ami of their dog – I may or may not post about that at a later time. After some struggle, I did manage to finish it and sent it off! I have a little peak of the finished pup on my Instagram page.

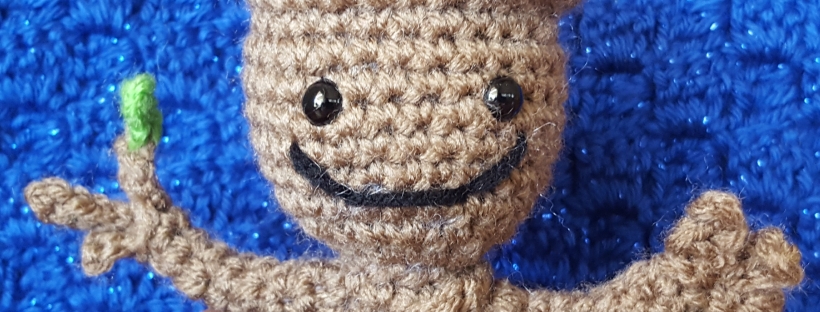
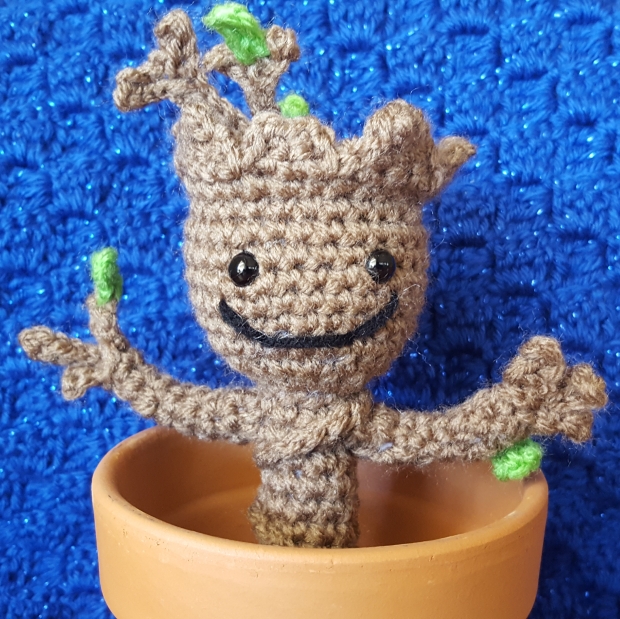
The other commission I had was for a Baby Groot from Guardians of the Galaxy. A friend of mine from high school has two little girls and she wanted to surprise them with a little Groot of their own. At the time, I didn’t really have it in me to make my own pattern. But I remembered that Twinkie Chan had made a Baby Groot a while back and that she had the free pattern for it on her blog! I sent my friend a link to the blog post and asked her if she approved – she said yes. Yay!

So, I grabbed my tools and made sure I had the correct colors and got to work. Right away I had to make a few changes due to the materials I had on hand. Twinkie Chan uses a tweed for the body/head and a thread-like yarn for the leaves. I don’t own either of those things I used what I had: Red Heart Cafe Latte and Spring Green.

Overall, this pattern was very easy to follow and I highly recommend it if you’re looking into making your own Baby Groot! The vine and leaf placement are entirely up to you so it makes it very customizable. Oh, and did I mention the arms are poseable? Yup! The magic of pipe cleaners. The only thing I was missing was a cute little pot to put it in. As you can see, I only had a larger terra cotta pot which kind of swallowed him up!

When I completed the plushie, I posted some photos of it on my IG and another one of my friends asked me to make one! This time it was for a couple celebrating their wedding anniversary. Awwww…

Definitely check out Twinkie Chan’s pattern if you’re looking to make your own Baby Groot! I might just have to make one for myself – it’s so dang cute!

See you soon!

More photos of Baby Groot:

For more details, check my Ravelry project page here! πŸ™‚

Then Vs Now: Mario Mushroom

Happy Saturday!

So, I feel like I shouldn’t really categorize this under “Make Overs” because the pattern hasn’t been adjusted in any way. Also, it’s not my pattern.

I just thought it would be fun to see how my crochet skills have developed since I began crocheting amigurumis, like, 5+ years ago!

If you can’t tell, the top left was my first attempt. At this point, I was just beginning and still was not aware of the whole “right” and “wrong” side thing. My sewing skills were a bit lacking – they still aren’t great, but I’ve definitely improved! Also, I think I may not have stuffed the mushroom properly. It seems a little… floofy? Ha!

If you’d like to make your own Mario Mushroom, use this pattern by Ami Amour!

Let’s Play Catch-up!

Well, it’s already April.

Where the heck did March go?! One minute I was working on March’s “Meet the Maker” (yeah, that didn’t pan out – but more on that in a minute) and the next thing I knew it was Easter! It could be because I have kids, but the time just seems to go by so fast now. You know, unlike the K-12 years which seem to drag on and on and on. Ha!

Since we’re on the topic of Easter, let’s start with that for our catch-up.

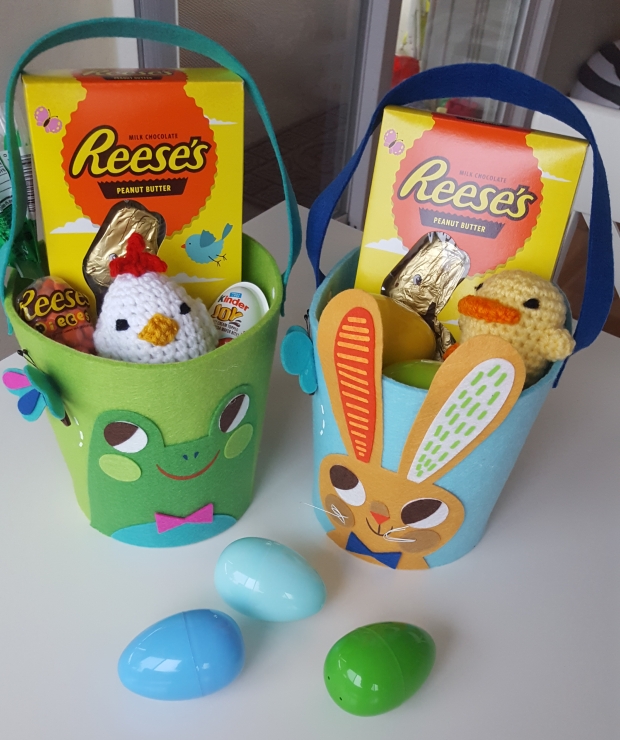
Because my kids get royally spoiled by their Grandparents when it comes to holidays involving gifts, I didn’t go overboard on their Easter baskets this year:

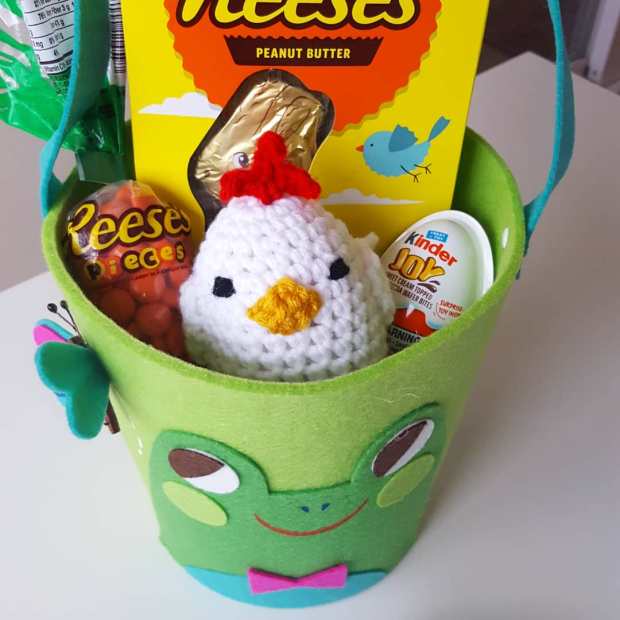
I filled both of the baskets with 3-5 large plastic eggs containing fruit snacks (more in my youngest’s since he didn’t have much else put in his basket), a Reese’s chocolate bunny, and a plushie. Also included in my oldest’s basket was a “carrot” filled with Reese’s Pieces and a Kinder egg. He used to watch those mystery egg videos so I thought he’d love it – he was underwhelmed. Heh.

For the plushies, I used free patterns from Ami Amour! I made the chick for my oldest and the duck for my youngest. I’ve made the chick in the past but I have no clue where it is! So, I felt it was time to make a new one and what better time than Easter? (I’ll need to find my old one so I can compare them!) You can find the “Eggy the Cute Chick” pattern here.

The duck pattern was released right before Easter and it is too cute! It’s also smaller than I thought it would be – I was thinking it’d be about the same as the chick. But he’s so cute and squishy! I almost added in a plastic egg filled with rice to make it into a shaker, but it made the duck too hard. You can find the “Fair is Fowl” pattern here.

Here are the two plushies on their own playing spin the egg:

They are both just too cute! If you want something quick to make for Spring or for your kiddos, I’d recommend these two.

Onto the next item on our list!

…what do you mean there’s no list? Oh, there is. It’s a mental list – the best kind! The one where the items magically disappear when you need them.

Alright – so we’re going back in time now. Exactly a week prior to Easter, my husband and I celebrated our 6th wedding anniversary! Now, the traditional gift to give for your 6th anniversary is iron. But… what the heck am I going to give him that involves iron?! One suggestion online was golf clubs, but that’s not our jam. My friend made jokes about a ball and chain or sword. And, later on, my husband said cast iron skillet (but he doesn’t cook anything involving one, sooooo why?). At this point, it was a few days before our anniversary (I totally forgot!) and there wasn’t time to order anything. So, I decided to make something instead.

I searched and searched and FINALLY saw a photo that saved me:

Click for source

Donuts? For an anniversary gift?! Woo hoo!

But, there was a catch – I didn’t want him to be like, “Why are you trying to make me fat?!” So, I opted for some crochet donuts instead…

Okay.

I also made some donuts.

Because I like donuts.

I was going to go buy some, but my lazyness got the better of me (hey, I have two kids I’d have to pack up, etc). So, I found a recipe for some baked donuts that use a cake mix and made those.

They were… not that great. Oh, well.

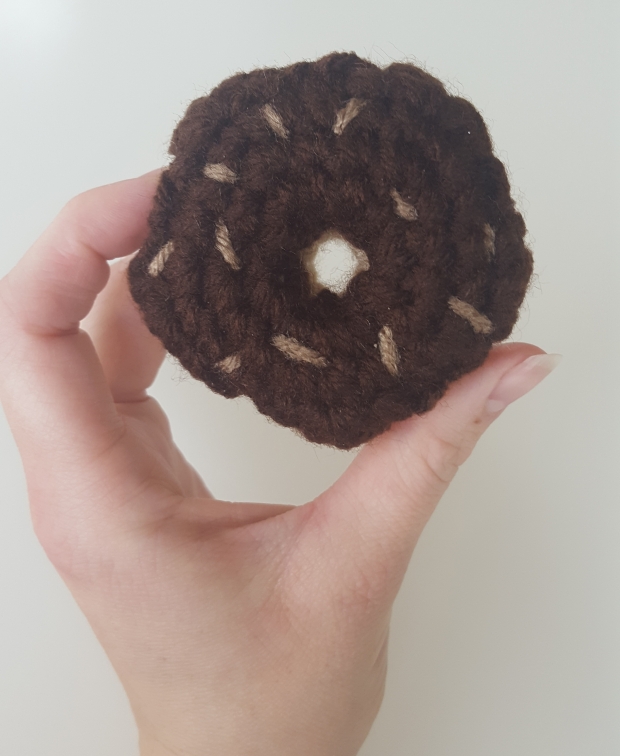
The crocheted donuts, on the other hand, were super cute!

I found a YouTube video from Jayda InStitches and used that for 5 of the donuts. They were super easy to make!

Then my friend, the same one who suggested a sword, said that I needed to include a heart-shaped donut, too! I remembered that Twinkie Chan had made her heart donut pattern available for free on Valentine’s Day and made my way over to her YouTube channel.

Here are the completed donuts:

They’re so small!

Now that I’ve made some donut patterns from other people I want to try my hand at making my own. I just need to get on that. Someday. It’s interesting to see the different techniques used to make them!

Alright – next item on the “list!”

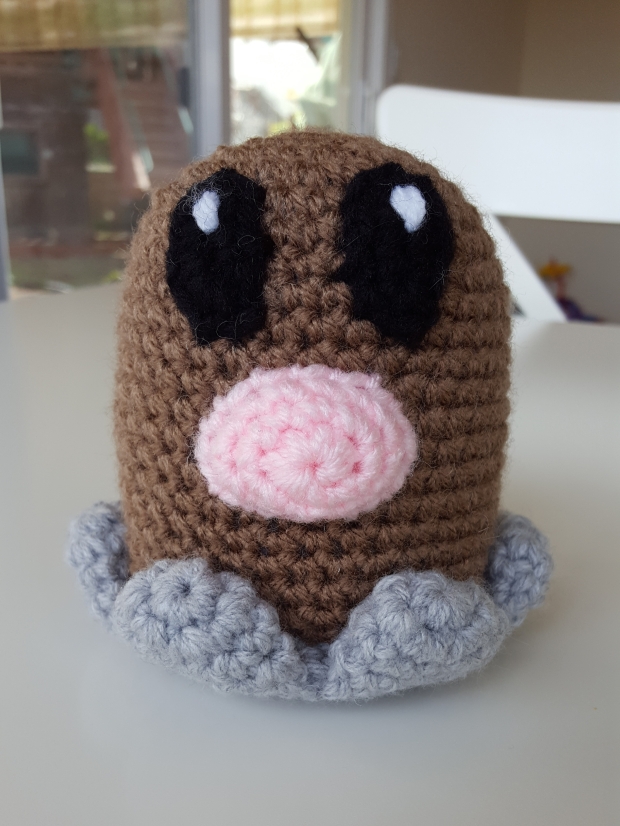
I also made a Diglett!

I adapted my Whacka pattern to make this guy since they are such a similar shape. Easy peasy.

I’ve already added him to my Etsy shop!

Let’s see… what else is there to mention?

Well, I guess the last thing to talk about is the March “Meet the Maker” prompt I was trying to follow on Instagram (started – didn’t finish).

Prompt by @joannehawker on IG

I think I might have been doomed from the start considering I didn’t even start posting until a few days in!

If you’re already following me on IG, then you’ll have seen that I got up to Day 17! That’s more than halfway – I really should have just finished it. What kept happening is that I wouldn’t post and then I’d have to catch up and it started to get annoying… Oh, well.

Here are a few examples:

Day 16: Helper

Day 7: Routine

Day 8: Flatlay

It was interesting seeing everyone else’s posts during this time and learning new things about the artists I follow!

I’m thinking that maybe I’ll finish them up in a blog post at a later time. What do you think?

Well, I guess that’s it for now! I think I’m all caught up on here now. As always, I’ll promise to be more active, but you know how that goes! I may just start doing a monthly post instead. πŸ˜‰

Until next time!

It’s Poogie Time!

My husband has been playing a lot of Monster Hunter World recently – anyone else?

I’ve never played it myself, but it has this cute little pig in it called a Poogie! My husband has said to me in the past (before this particular game was out) that I should make one. I, of course, added it to my mental to-do list which always seems to be mentally deleted. Whoops.

So, I studied a few pictures of it, including some screenshots of my husbands game, and got to work! Originally, I was going to use white and teal because I was loosely basing it off of a plush they sold at one point. However, I found this lighter teal in my yarn stash from a different project and it is a perfect match to the outfit Poogie is wearing in Monster Hunter World! I was also just winging it on the amount of stripes to use and we ended up counting those, too. Gotta have it as close as possible! The only thing I didn’t include was the buttons on his back. I’m not sure if that is a normal inclusion on previous Poogie generations, but I didn’t want to use them on this one.

I did use a new technique on this little guy! Where his head leaves his sweater/pajamas/bodysuit(?) I did the first row of beige in the 3rd loop which is on the inside of the plushie. This gave it a bit more definition than if I had just done it in the back loop which I had done originally. It looks so much better this way!

For Poogie’s tail, I found a cute bow pattern online from Daisy Cottage Designs! I went down to a size F hook, I believe, to make sure it was small enough. I also used a pipe cleaner in his tail to make sure the tail had a cute little curl.

Poogies also have ridiculously long ears! Haha! I probably should have made them slightly longer and even added in pipe cleaners to those, too. But I think they look fine as is… although maybe a smaller hook might be a good idea as well. Hmm… thoughts for next time! It’s always a good idea to update a pattern once in a while to change the things you may not have been 100% on in the first place. Plus, it will give me a future post. I’m also thinking of making a regular pig based on this pattern as well.

Well? What do you think? I think Poogie turned out great!

___

Poogie is now available in my Etsy shop as made to order! I’d love it if you’d check it out and share it with your friends! πŸ™‚

Getting into the Valentine’s Day Spirit!

Hello and Happy Monday!

Valentine’s Day is just around the corner and my V-day crafting is in full swing! I’m generally not one to hype up this particular holiday, but the feeling was just so right this year!

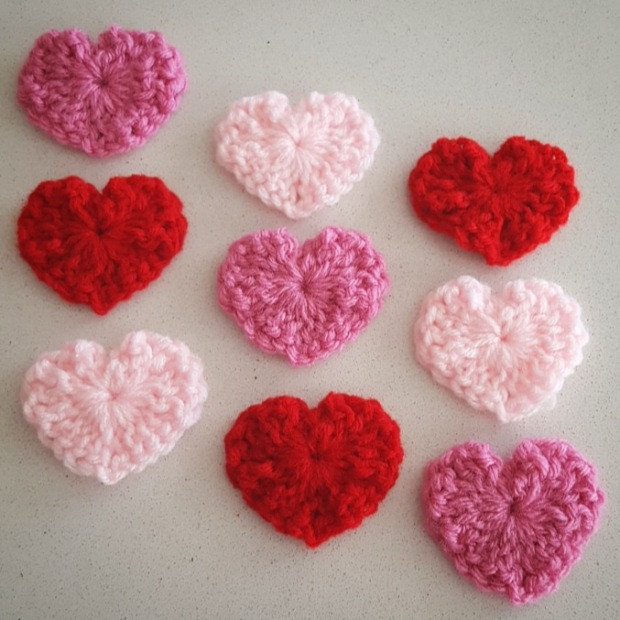
So far I’ve made a bunch of hearts, some red and pink bees, and a few sets of my Mini Meat Boys and Bandage Girls (which aren’t really V-Day on their own, but whatevs). You can find all but the hearts in my Etsy shop (but if you’d like some hearts, I’d be more than happy to include some)!

Here are a few photos:

If you’re following me on Instagram (which I hope you are!) then you’ve already seen these. I’m much more active on there than I am on my poor, forgotten blog…

I’ll try to make more posts – promise! πŸ˜‰

What are you making for Valentine’s Day?

If you need some inspiration, check out my old Fresh Friday post that has a bunch of cute crochet ideas!

Have a great week! ❀️